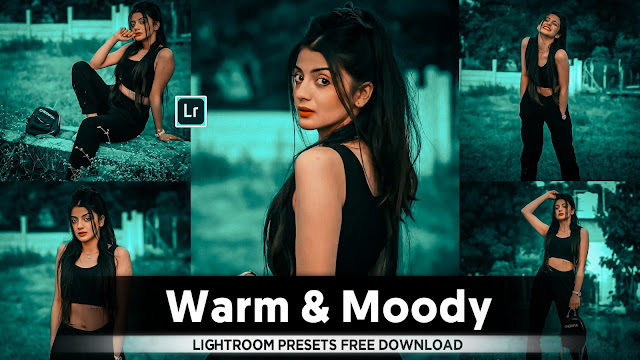
- Lightroom Mobile Colourful Preset Download...
1. Lightroom Open :- pahle photo ko select karke lightroom app mein share karna hai FIR lightroom app ko open karna hai usmein photo open karna hai.
2. Lightroom light's :- sab me pahle exposure, contrast, highlight and shadow, whites, blacks ine sabhi ko minus adjustment karna hai matlab photo mein jitni bhi light Se usko kam karna hai.
3. Lightroom colours :-
i) First tems -8, second tint -4, vibrance +81, and shadows -17.
ii) color mix tools opne first colour rate hue +7, Saturation +23, luminance -10.
iii) second colour orange hue -7, Saturation -20, luminance +30.
iv) third colour yellow hue +20, Saturation -22, luminance -6.
v) four colour green hue +21, Saturation -56, luminance +7.
vi) fifth colour blue hue -28, Saturation +63, luminance +28.
vii) six colour purple hue -10, Saturation -3, luminance 0.
4. Lightroom effects :-
i) Texture +24, Clarity +55, Dehaze +25.
5. Lightroom Vignette:-
i) Amount -20, Midpoint +24, Feather +86, Roundness +17, Highlight +5.
6. Lightroom Grain :-
i) Amount +8, Size +23, Roughness +50.
7. Lightroom Details :-
i) Sharpening Amount +67, Radius +0.90, Detail +25, Masking +64.
8. Lightroom Noise :-
i) Noise Reduction +32, Detail +52, Contrast +14.
9. Lightroom Color Noise :-
i) Colour Noise Reduction +17, Detail +50, Smoothness +60.
10. Curve Adjustment :- five points last point halka upar centre point halka neeche 4th point bhi halka niche.
• Naxt masking adjustment :-
i) Select subject : background select first light exist background brightness kam Karen. Colours exist temperature calculation minus 3,3 effect exist a texture +8, clarity +20, dehaze +14.
• yah sare step ko follow karke aap yah photo edit kar sakte hain colourful filter tone.
• Introduction to Colorful Filters in Lightroom:- Colorful filters can enhance the mood and aesthetic of your photos by adding vibrant tones and effects. Adobe Lightroom offers powerful tools to apply and customize these filters to achieve your desired look.
Step 1: Import Your Photo: Open Lightroom and import the photo you want to edit. Click on the "Import" button and navigate to the location of your photo. Select the photo and click "Import" to add it to your Lightroom catalog.
Step 2: Navigate to the Develop Module: Once your photo is imported, navigate to the Develop module by clicking on the "Develop" tab at the top right corner of the screen. This module contains all the editing tools you'll need to apply colorful filters and make adjustments to your photo.
Step 3: Adjust Basic Settings: Before applying colorful filters, it's important to make basic adjustments to your photo. Use the Basic panel to adjust settings such as exposure, contrast, highlights, shadows, whites, and blacks to ensure your photo has a good foundation.
Step 4: Apply a Colorful Preset: Lightroom offers a variety of colorful presets that you can apply to your photo with just one click. Navigate to the Presets panel on the left side of the screen and browse through the available presets. Click on a preset to apply it to your photo and see how it affects the colors and tones.
Step 5: Customize the Preset: Once you've applied a preset, you can customize it to better suit your photo and personal style. Use the sliders in the Basic panel to adjust settings such as temperature, tint, vibrance, and saturation to fine-tune the colors in your photo.
Step 6: Use the HSL Panel: The HSL (Hue, Saturation, and Luminance) panel allows you to individually adjust the hue, saturation, and luminance of specific colors in your photo. This is useful for making targeted color adjustments and creating a more cohesive look.
Step 7: Experiment with Split Toning: Split toning allows you to add different colors to the highlights and shadows of your photo. Experiment with different hue and saturation values to add a colorful tint to your photo and enhance its mood.
Step 8: Add Graduated and Radial Filters: Graduated and radial filters allow you to apply adjustments to specific areas of your photo. Use these tools to selectively enhance or tone down colors in different parts of your image, adding depth and dimension to your edits.
Step 9: Fine-Tune with Adjustment Brushes: The adjustment brush tool lets you paint adjustments onto specific areas of your photo. Use this tool to fine-tune colors, enhance details, or add selective effects to make your photo truly stand out.
Step 10: Finalize Your Edit: Once you're happy with the colorful filters and adjustments you've applied, take a final look at your photo and make any additional tweaks if needed. Pay attention to details such as cropping, sharpening, and noise reduction to ensure your photo looks its best.
• Conclusion:
Using Lightroom's powerful editing tools, you can easily apply colorful filters to your photos to enhance their mood and aesthetic. Experiment with different presets, adjustments, and tools to unleash your creativity and create stunning images that truly pop.
- Lightroom mobile presets ka istemal karna photo editing ko bahut hi aasan bana deta hai. Niche diye gaye steps follow karein:
- Lightroom Mobile App Open kare: Apne mobile device mein Lightroom mobile app ko open karein.
- Photo Import kare: Photo edit karne ke liye, Lightroom app mein photo ko import karein. Iske liye, "+" icon par tap karein aur phir "Add Photos" select karein, ya phir direct gallery se photo select karein.
- Edit Panel Open kare: Photo select karne ke baad, bottom panel mein Edit icon (jaise pencil ya sliders ka icon) par tap karein.
- Presets Panel Open kare: Edit panel mein, top-right corner mein ek three-dot menu hoga. Us par tap karein aur "Presets" option ko select karein.
- Presets ko Browse karein: Ab aapke samne presets ka collection hoga. Aap presets ko scroll karke browse kar sakte hain aur jis preset ko apply karna chahte hain, us par tap karein.
- Presets Apply karein: Jab aap preset par tap karte hain, to wo automatically aapke photo par apply ho jayega. Aap dekhenge ki aapka photo preset ke according change ho jayega.
- Adjustments karein (optional): Agar aapko preset ke baad bhi kuch adjustments karna hai, to aap editing tools ka istemal karke further adjustments kar sakte hain.
- Save karein aur Share karein: Jab aap satisfied ho jaayein apne editing se, to "Done" ya "Save" button par tap karein. Phir aap photo ko apne gallery mein save kar sakte hain ya direct social media platforms par share kar sakte hain.
Is tarah se aap presets ka istemal karke Lightroom mobile app mein aasani se photo edit kar sakte hain...Killer Editing
- Lightroom next level colourful preset download Videos...💖


Comments
Post a Comment